

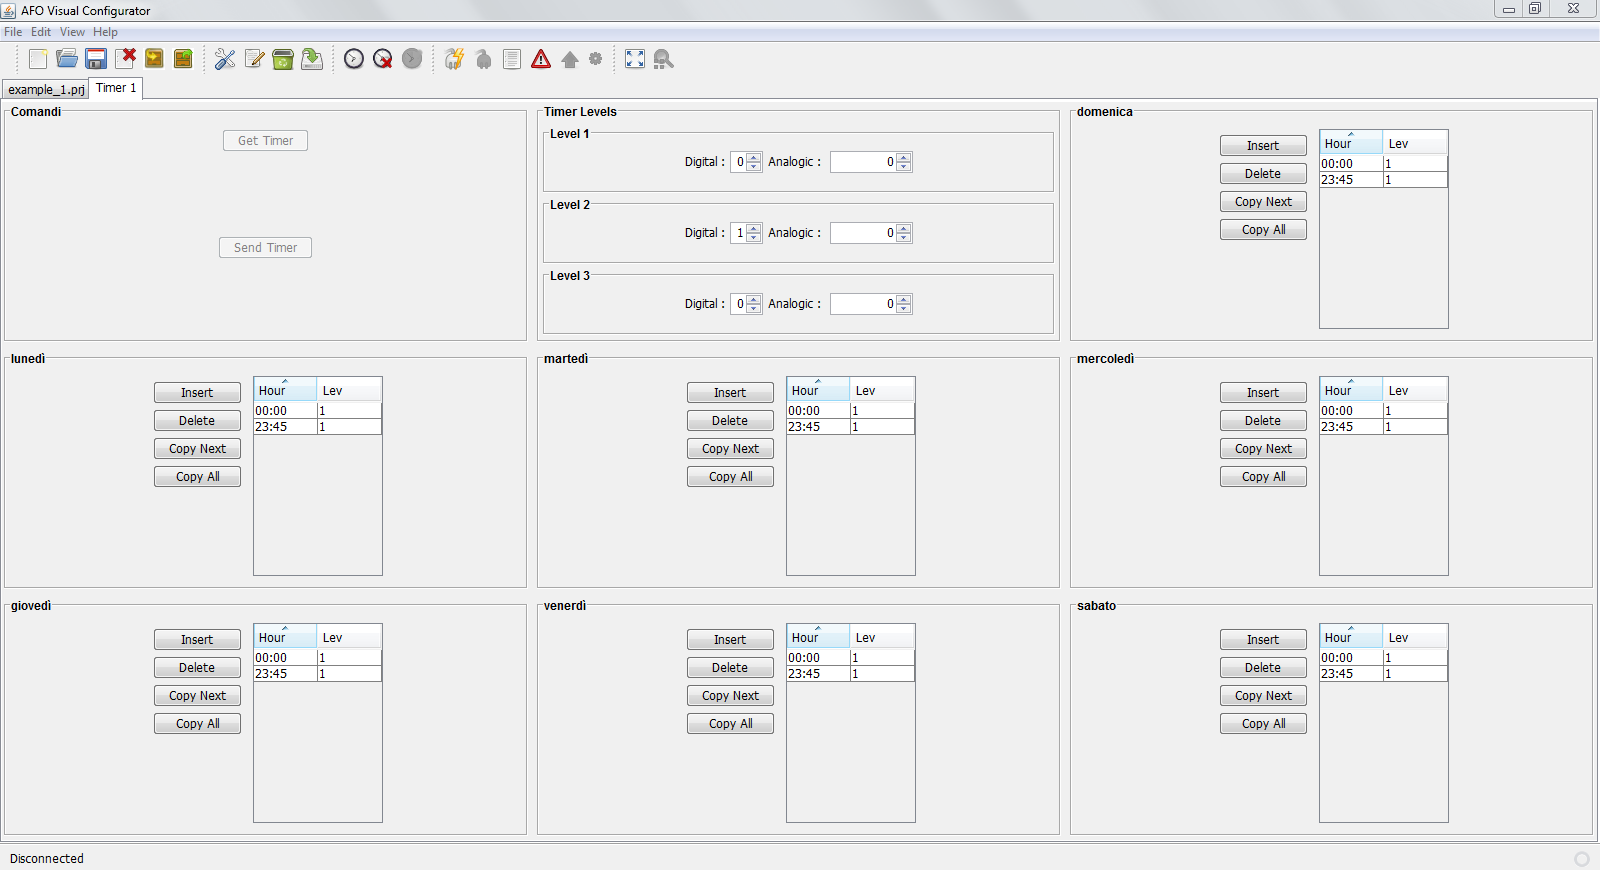
This style of programming allows to define almost any type of logic without requiring any programming skill. The system has also prebuilt advanced control functions such as interpolation functions, PID (Proportional, Integrative and Derivative function), three points valve actuators, saturation and so on. It is also possible to add timer functions to perform your tasks at specific times using a weekly calendar.
Analisys of a Function Block
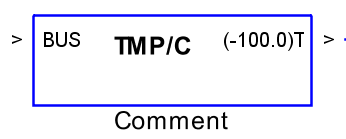
Function blocks are divided in two groups:- Driver Blocks - The role of this blocks is to interface with the on field hardware.
- Logic Blocks - This blocks allow the user to define the logic of the system
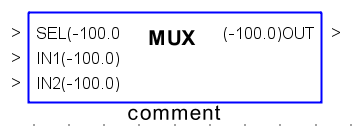
Each FB may have input pins and/or ouput pins, on the side of each pin there is the value of the pin while the program is running. In this case they read -100.0 meaning that no data has been acquired. In the center of the block is reported its type while below the block there is a customizable comment field: by double clicking it is possible to change the field. The main difference between driver blocks and logic blocks is that tha former have always a BUS input pin. This pin is used to specify to which M232 master module that hardware is connected to . By right clicking on the block it is possible to open a properties window that allows to set the inner parameters of the block. For the driver blocks it is mandatory to specify, in reverse byte order, the OneWire address of the specific device.
Interaction
Interaction with the program is as easy as follows:- Left mouse button selects and moves the rectangles. It is possible to draw a rectangle to select more items
- Middle mouse button is used to pan the scene
- Right mouse button opens a context sensitive pop-up menu
- Left Mouse button + CTRL key allows to connect the blocks
- Mouse Wheel + CTRL key allows to zoom in and out