A little bit of Hystory
A couple of years ago with my company we developed a control system entirely based on the OneWire line of Dallas Maxim. The system was composed by two main parts: the field elements and a central controller. The former part was built using common OneWire devices and had the following I/O’s:
- DS2408 based digital inputs/outputs (dubbed DO8, DI8 and IOD4)
- DS2438 based 0-10 Vdc analog inputs (AI1)
- DS2890 based 0-10 Vdc analog outputs (AO1)
- DS18B20 and DS18S20 temperature sensors
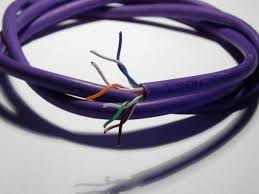
 A special module called OneWire master (based on the DS2480B chip) was used to interface through a serial RS232 port to the OneWire network. It provided also the necessary power to power the field elements such as solid state relays and analog outputs. The bus was cabled using a standard CAT5e cable to ensure both low costs and easy cabling. For commercial reasons the bus was named AllForOne but it was just a plain one wire network. The central controller was the mighty Fox Board from ACME Systems: it was a really powerful and inexpensive embedded board based on the Axis ETRAX chip with two usb ports, an ethernet port and a custom Linux distribution with kernel 2.6.
  On the software side we developed three different programs: one to define the logic of the system, one to perform the automation that was running on the FOX board and one to remotely connect to the system and manage it. With this system we managed to automate various types of plants: from simple Air Treatment Units to room heating control via thermal plants or lighting. At one point we managed to use also 1Wire buttons to control hotel rooms. Around the middle of 2009, sadly, Dallas announced that they will soon cease the production of almost all of the OneWire devices so we decided to use our know how to redesign from scratch a brand new line of controllers that will use company independent bus like the RS485 and Modbus protocol and the one wire project served as a starting point for the new controllers.
The Raspberry Automation Project
Flash forwarding to today it seems that the guys at DallasMaxim changed their minds and kept producing their wonderfule chips and, while the old FOX board is not on sale anymore, we have a plenty of choice of brand new powerful and inexpensive boards. Therefore we decided to start the Raspberry Automation Project by porting our software to the PI and releasing it under an LGPL license. The latter decision has maturated from the fact that since we used some open source software during our development years it is time to pay it back by releasing some software on our own. The project is formed byt the following programs released either in a binary form for a quick startup and in source form for the more adventurer:
- RaspyMonitor — the automation software that runs on the Raspberry PI. It is a command line program that can run in background
- RaspyProg — The visual programming tool. It is used to define the logic that will be executed by RaspyMonitor in a visual and easy way
- RaspyVisor — The control software. It allows to connect to Raspymonitor with a more user friendly interface and to control the system. (coming soon).
 Raspymonitor may be used with every standard OneWire device that is equipped with the supported chips and accessible through a DS2480B OneWire Master or you may head to the Shop where it is possible to buy our standard devices that fit on a DIN rail for a more convenient installation. Moreover RaspyMonitor runs also on a standard Linux PC or on any other Linux machine provided it is possible to compile it for that architecture. In the following weeks we will update the blog with more in depth explanations of the architecture and the logics that it is possible to construct.
Have Fun!!